You don’t need nail art tools to create good-looking nails at home. With basic items like nail polish, a toothpick, or even your fingers, you can achieve clean and simple designs. The key is choosing styles that don’t require precision tools and focusing on easy techniques that anyone can follow.
Who Should Use This / Who It’s For
This guide is for:
- Beginners who don’t own nail art tools
- Students or anyone on a budget
- People who want quick DIY nail designs
- Anyone who prefers simple, low-effort styles
It’s especially useful if:
- You don’t want to invest in brushes or kits
- You struggle with detailed nail art
- You want something fast and practical
1. Single Color Nails (Clean Start)
What it is: Applying one color evenly on all nails
When to use: Everyday wear, work, or casual outings
Why it works: It’s neat, simple, and hard to mess up
How to do it:
- Apply a base coat
- Add two thin layers of polish
- Finish with a top coat
This is the foundation of all nail art. If you can do this well, everything else becomes easier.
2. Accent Nail (One Nail Different)
What it is: Keeping one nail different from others
When to use: When you want a slight upgrade without effort
Why it works: Adds style without needing skill
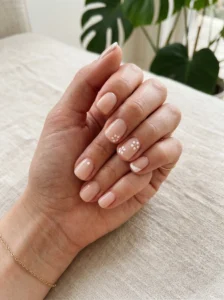
Paint all nails the same color and use glitter or another shade on one nail (usually the ring finger).
3. Polka Dots Using a Toothpick
What it is: Small dots on nails
When to use: Cute and playful looks
Why it works: No need for brushes
Dip a toothpick into polish and gently press dots onto your nail. Keep them small for a cleaner look.
4. Gradient Nails Using a Sponge
What it is: Blending two colors softly
When to use: Trendy or slightly advanced look
Why it works: The sponge does the blending for you
Dab two colors onto a sponge and lightly press onto your nail. It creates a soft fade effect.
5. Tape Line Design
What it is: Straight lines using tape as a guide
When to use: Minimal and modern styles
Why it works: Tape replaces precision tools
Apply tape on your nail, paint over it, then remove it to reveal clean lines.
6. Glitter Overlay
What it is: Adding glitter over base color
When to use: Parties or events
Why it works: Covers mistakes easily
Just apply glitter polish over dry base color. Focus on tips or full nails.
7. Two-Tone Nails (Split Design)
What it is: Two colors on one nail
When to use: Simple creative look
Why it works: No detail work required
Paint half the nail one color, then the other half with a different shade.
8. Finger Smudge Marble Effect
What it is: Soft mixed colors
When to use: Trendy casual style
Why it works: Doesn’t need perfection
Apply two colors and lightly smudge them together using your fingertip.
9. Minimal Dot Flower Design
What it is: Flower made with dots
When to use: Daytime or cute look
Why it works: Easy pattern
Use a toothpick to place dots in a circular shape to form a flower.
10. Negative Space Nails
What it is: Leaving part of nail unpainted
When to use: Modern minimal look
Why it works: Less work, more style
Apply polish only on part of the nail and leave the rest clean.
11. Simple Heart Design
What it is: Small heart shape
When to use: Special days or casual wear
Why it works: Easy with basic tools
Use two small dots and connect them to form a heart using a toothpick.
12. French Tips Using Fingers
What it is: Classic tip style without tools
When to use: Clean and elegant look
Why it works: No brush needed
Dip your fingertip lightly in polish and gently tap the nail tip.
13. Matte Finish Nails
What it is: Non-shiny nails
When to use: Modern look
Why it works: No design needed
Use a matte top coat over any polish.
14. Random Color Nails
What it is: Different color on each nail
When to use: Fun and relaxed style
Why it works: No precision needed
Just choose colors that look good together.
15. Simple Stripe with Toothpick
What it is: Thin lines using a toothpick
When to use: Minimal design
Why it works: Easy to control
Drag a toothpick dipped in polish across the nail gently.
Pros and Cons
Pros
- No need to buy tools
- Budget-friendly
- Easy for beginners
- Quick to apply
Cons
- Limited design options
- Less precise compared to tools
- Requires patience at the start
Tips & Common Mistakes
Tips
- Always apply thin layers of polish
- Let each layer dry properly
- Start with simple designs before trying more
- Use household items like toothpicks or tape wisely
Common Mistakes
1. Applying thick polish
Leads to uneven and messy nails
2. Not waiting for drying
Smudges the design
3. Using too much polish on tools
Creates large, messy patterns
4. Trying complex designs too early
Causes frustration and poor results
Conclusion
You don’t need professional tools to create stylish nails at home. Simple techniques like dots, gradients, and clean color application can give you great results. Focus on neatness and basic designs, and your skills will improve over time.
Start simple, stay patient, and you’ll be able to create better nail designs with each attempt.