Doing your nails at home sounds simple — until you sit down with polish and suddenly nothing looks neat. Lines smudge, colors clash, and the final result doesn’t match what you imagined.
The truth is, most at-home nail frustration comes from choosing designs that are too complicated. You don’t need professional tools or advanced techniques. You just need ideas that are realistic, beginner-friendly, and easy to control.
In this guide, you’ll find 22 easy nail designs you can actually recreate at home. Each one is simple, practical, and designed to look cute without requiring artistic skills. I’ll explain how to do them step by step and share small tips that make a big difference.
Let’s keep it simple and make your next manicure stress-free.
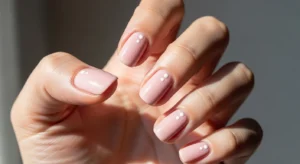
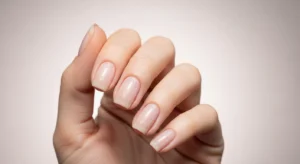
1. Classic Single-Color Glossy Nails
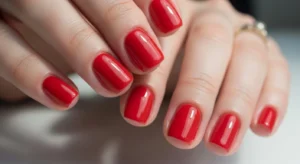
Sometimes the simplest option looks the cleanest.
Choose one shade you genuinely love — soft pink, beige, cherry red, or even pastel blue. Apply a base coat, two thin layers of polish, and finish with a glossy top coat.
Tip: Thin layers dry faster and look smoother than one thick coat. If your polish streaks, wait for the first coat to dry fully before applying the second.
This design works for school, work, or everyday wear.
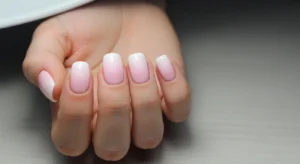
2. Soft Nude Nails That Match Everything
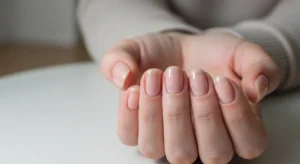
If you want something low-maintenance, nude nails are your best friend.
Pick a nude shade that matches your skin tone closely. The closer the match, the more natural and clean it looks.
Beginner tip: Clean the edges with a small angled brush dipped in nail polish remover. This instantly makes the manicure look professional.
Nude nails grow out less noticeably, which means fewer touch-ups.
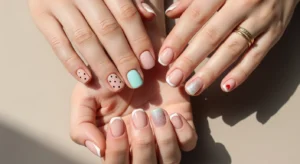
3. Minimalist White Dots
This is one of the easiest nail art ideas ever.
Paint your nails any base color. Once dry, dip a toothpick or bobby pin into white polish and lightly press tiny dots onto your nails.
You can:
-
Place one dot near the cuticle
-
Create a straight line of dots
-
Add random scattered dots
Keep the dots small for a delicate look.
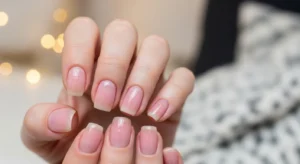
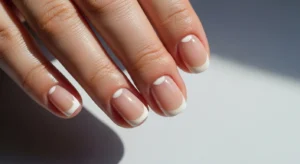
4. Simple French Tips (No Special Tools)
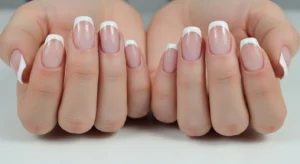
French tips don’t need salon precision.
After your base color dries, use the natural curve of your nail as a guide. Slowly swipe white polish across the tip in small strokes.
If that feels hard, try this:
-
Paint the entire nail nude
-
Add a slightly thicker white tip so small mistakes aren’t obvious
Finish with top coat to smooth everything out.
5. Diagonal Color Block Nails
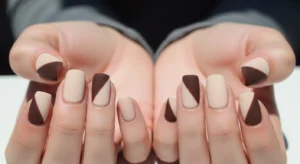
This design looks modern but is surprisingly easy.
Paint your nails with one color and let them dry completely. Then place a small piece of tape diagonally across the nail and paint the exposed section with a second color.
Remove the tape before the polish fully dries to avoid peeling.
This works beautifully with soft contrast shades like beige and brown or pink and red.
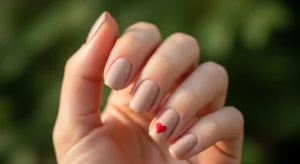
6. Accent Nail Design
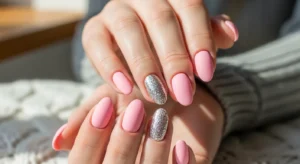
If full nail art feels overwhelming, start with one nail.
Paint all nails the same color, then add something small on your ring finger:
-
Glitter
-
Dots
-
A tiny heart
-
A different shade
This keeps things simple while still feeling creative.
7. Glitter Fade at the Tips
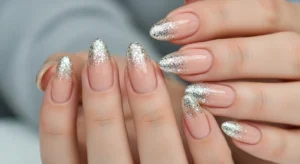
Want something slightly dressy but still easy?
Apply your base color and let it dry. Then dab glitter polish lightly onto the tips and gently drag it downward with the brush to create a fade.
The key is using less glitter near the middle of the nail.
It looks intentional, not messy.
8. Pastel Skittle Nails

This trend is perfect for beginners.
Paint each nail a different pastel shade — pink, lavender, mint, baby blue, and peach.
There’s no design skill required. Just make sure the colors look good together.
Lay the bottles side by side first to check the combination before painting.
9. Tiny Heart Detail
Hearts look complicated but can be done with dots.
Use a dotting tool or toothpick to place two small dots next to each other. Then drag the bottom slightly downward into a point.
Practice once on paper first.
Add just one tiny heart per nail to keep it clean.
10. Thin Line Across the Nail
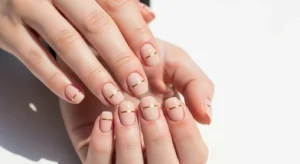
Minimal lines look elegant and modern.
Paint your base color. After drying, use a thin brush (or the corner of a polish brush) to draw a single straight line across the nail — horizontal or vertical.
If you don’t have a thin brush, trim a cheap nail brush slightly to make it narrower.
Keep the line subtle for best results.
11. Matte Top Coat Transformation

You don’t need new polish to change your look.
Apply a matte top coat over any glossy color to instantly transform it.
Matte nude, matte black, or matte pastel shades feel soft and trendy without extra effort.
12. Two-Tone Split Nails
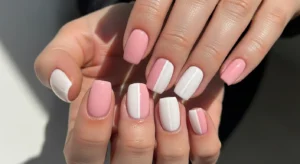
This design looks creative but stays beginner-friendly.
Use tape to divide your nail straight down the middle. Paint one half one color and the other half a different shade.
High-contrast combos look bold. Soft tones feel subtle.
Let the first side dry completely before taping over it.
13. Soft Ombre Sponge Effect
Ombre is easier than it looks.
Paint a light base color. Then apply two polish shades side by side on a small makeup sponge. Dab gently onto the nail until blended.
Clean around the edges with remover.
Don’t press too hard — light dabbing works best.
14. Tiny Flower Corners
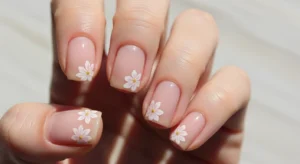
Perfect for spring or soft everyday nails.
Add five small dots in a circle to create petals, then place a contrasting dot in the center.
Keep the flower small and place it near one corner of the nail instead of the center.
This prevents overcrowding.
15. Micro Glitter Top Coat
If full glitter feels too much, use a sheer glitter top coat instead.
It adds shine without heavy sparkle.
This is ideal for:
-
Work settings
-
Simple everyday nails
-
Quick refreshes over old polish
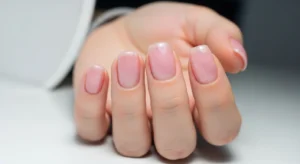
16. Short Natural Pink Nails
If your nails are short, embrace it.
File them neatly, apply a sheer pink polish, and finish with gloss.
Healthy cuticles and clean shaping make a bigger impact than complex designs.
17. Polka Dot All-Over Design
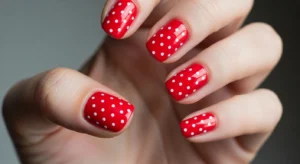
Polka dots feel playful and timeless.
Use two contrasting colors — like white dots on red or black dots on nude.
Keep spacing even by lightly marking dot positions first with a faint touch.
18. Reverse French (Half Moon)
Instead of painting the tip, highlight the base.
Leave a small half-moon shape near the cuticle unpainted or use a different color there.
You can use reinforcement stickers (for paper) as guides.
It looks unique but remains simple.
19. Soft Marble Effect
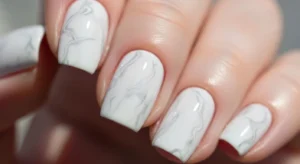
Marble doesn’t need perfection.
Apply a light base. Add tiny streaks of gray or white while the polish is still slightly wet. Gently swirl with a toothpick.
Less is more here. Too much swirling makes it muddy.
20. Minimal Gold Foil Accent
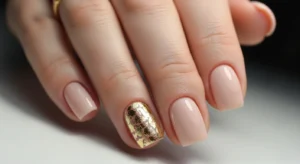
Gold foil flakes are easy to use and instantly elevate simple nails.
Apply a clear top coat, place a tiny foil piece with tweezers, then seal again.
Use sparingly for a clean look.
21. Clear Glossy Nails with Clean Shape
Sometimes bare nails with high shine are enough.
Buff lightly, apply strengthening clear polish, and focus on shaping.
This works especially well if you’re in between designs.
22. Soft Color with Tiny Rhinestone
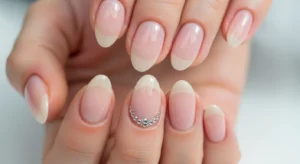
Add one tiny rhinestone near the cuticle on each nail or just one accent nail.
Secure it with clear top coat and seal around (not over) the stone to keep it shiny.
Keep stones small so they don’t snag on clothes.
Final Thoughts
Doing your nails at home doesn’t require complicated techniques or expensive tools. The key is choosing designs that are realistic for your skill level and focusing on clean application rather than perfection.
Simple ideas like dots, soft lines, accent nails, or subtle glitter can look just as beautiful as detailed nail art. When you work with thin layers, let polish dry fully, and clean up the edges carefully, even beginner designs feel polished.
Start with one or two styles from this list and practice slowly. Over time, your hands will become steadier, and the process will feel easier.
Cute nails don’t have to be complicated — they just need a little patience and the right simple idea.